I Built a Raspberry Pi Kubernetes Cluster from Scratch

One of the ideas I had to return to tinkering was playing around on a more fundamental level with Kubernetes (K8s). I have previous experience with RedHat OpenShift which is K8s under the hood. In my current role, however, we've gone full serverless, so I don't get to leverage K8s or its concepts anymore. And honestly, I love the serverless work I do now, it's exciting and quick to build, but there is something I miss about K8s. Maybe it's the more thorough control I get with networking, scalability, and resource management. Maybe it's because I sometimes shudder at the thought of what it would be like to change cloud providers at my current employer, and I admire the portability of K8s. And not only do I miss K8s, there was plenty I never got to do with it. Everything I've run on it is stateless and everything was pretty stable. I've never gotten to install a database on it, or test failure scenarios first hand
So this is the story of how I built Homie, my home K8s cluster.
Design
I had a few constraints going in: make it secure, make it physically elegant, make it functional, and have fun. Covering all the design decisions would I made would be a novel, but I want to highlight a few key design points.
Hardware
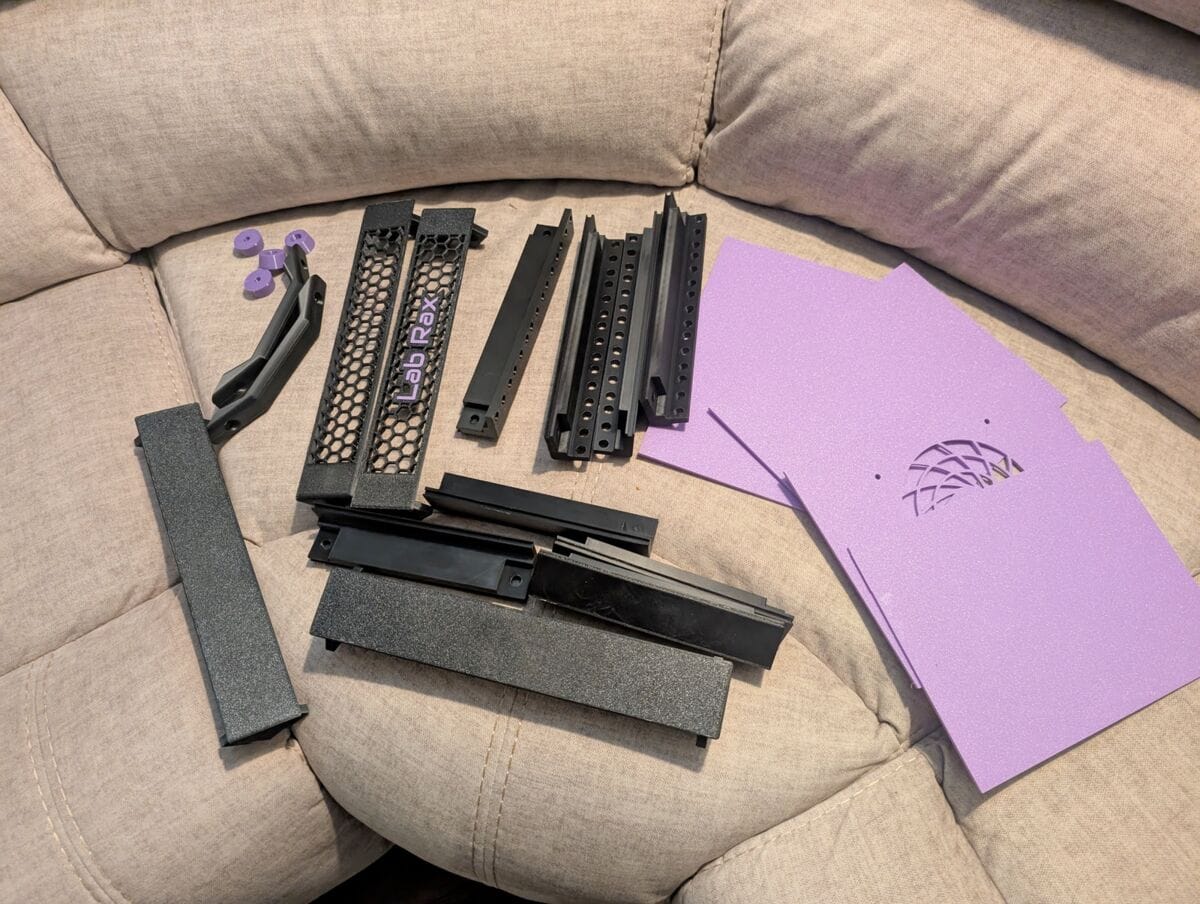
The choice of hardware was practically made for me. Raspberry Pis are cheap and work great in a home lab, with the obvious tradeoff being compute power. I also made the decision that I'd power them with Power over Ethernet (PoE) so that I wouldn't have to run a power cord for each Pi. To give them the PoE I decided the server might as well have its own dedicated on-board network switch. It's one thing to have a few Pis and a network switch sitting out on a table, but it's exciting to have a portable, contained home server. I was determined to find a design to print with my 3d printer, and looked at dozens of designs before I finally found the LabRax Server Rack. What I loved about the LabRax was that it was a real 10" server rack, and there were a ton of already designed shelves for it, including one that holds up to 7 raspberry pis. So I bought some PETG filament (PETG is able to withstand the temp without warping) and started queueing up the components on my 3d printer. Before you know it I had all my chassis printed and my couch looked like this:
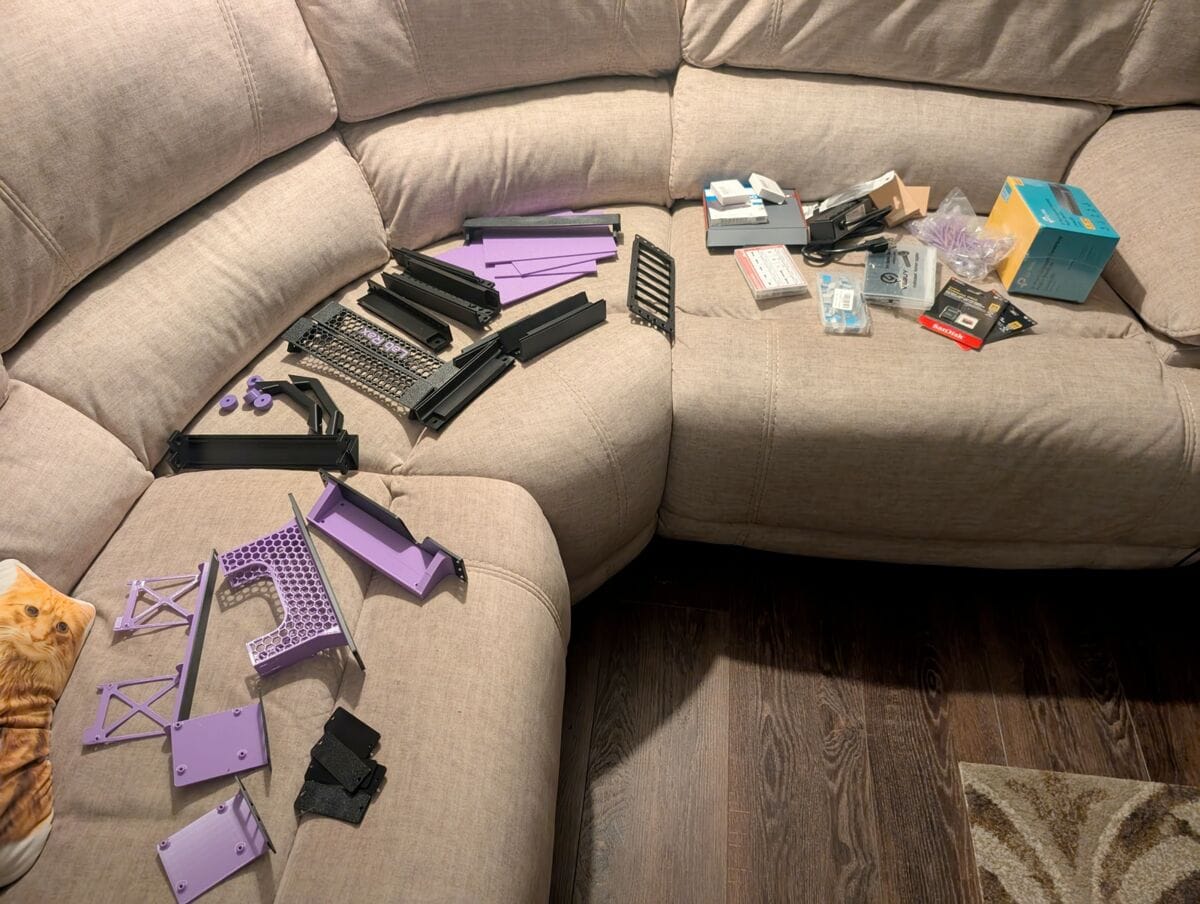
I then printed all the shelves, and placed my CanaKit and Amazon orders, and before you know it my couch looked like this:
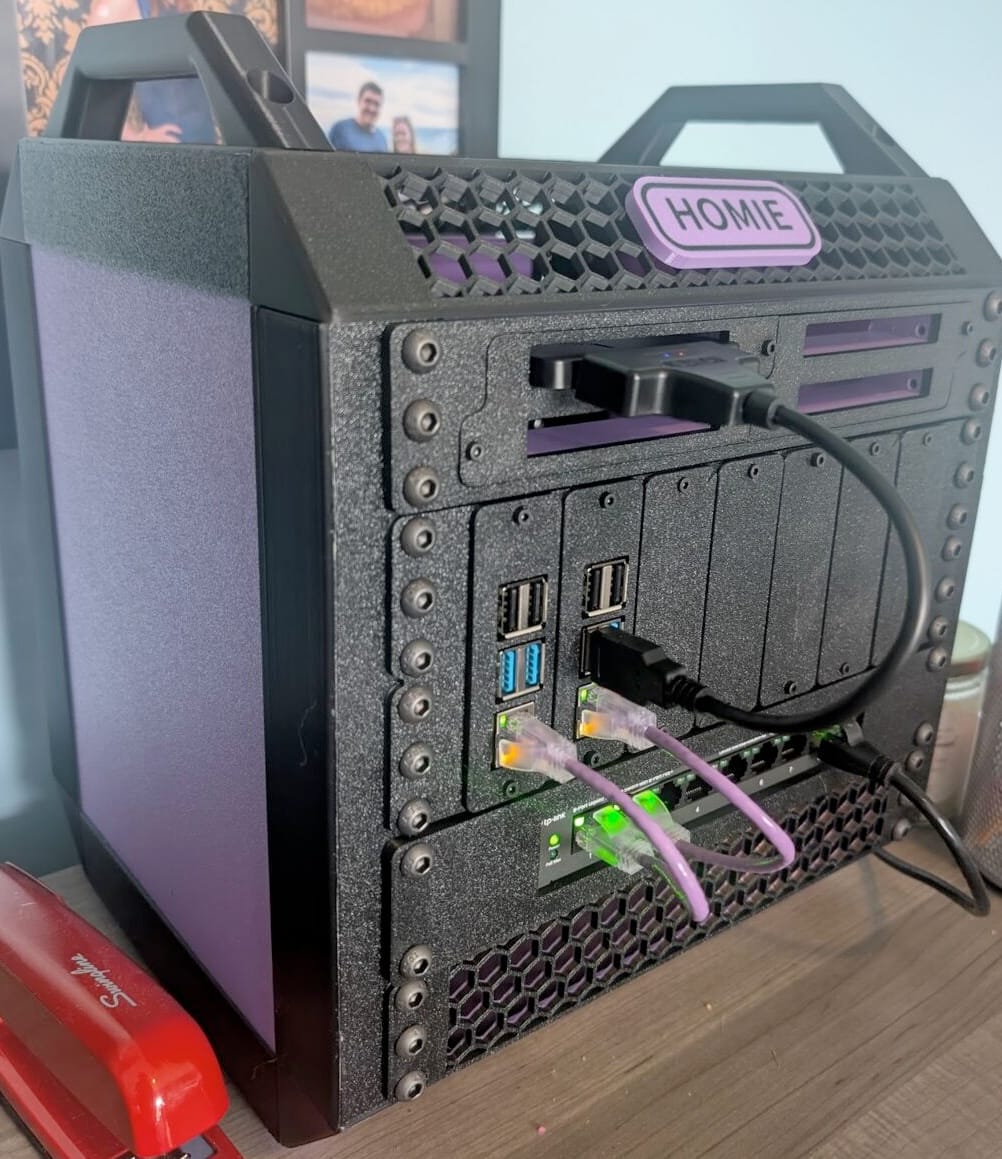
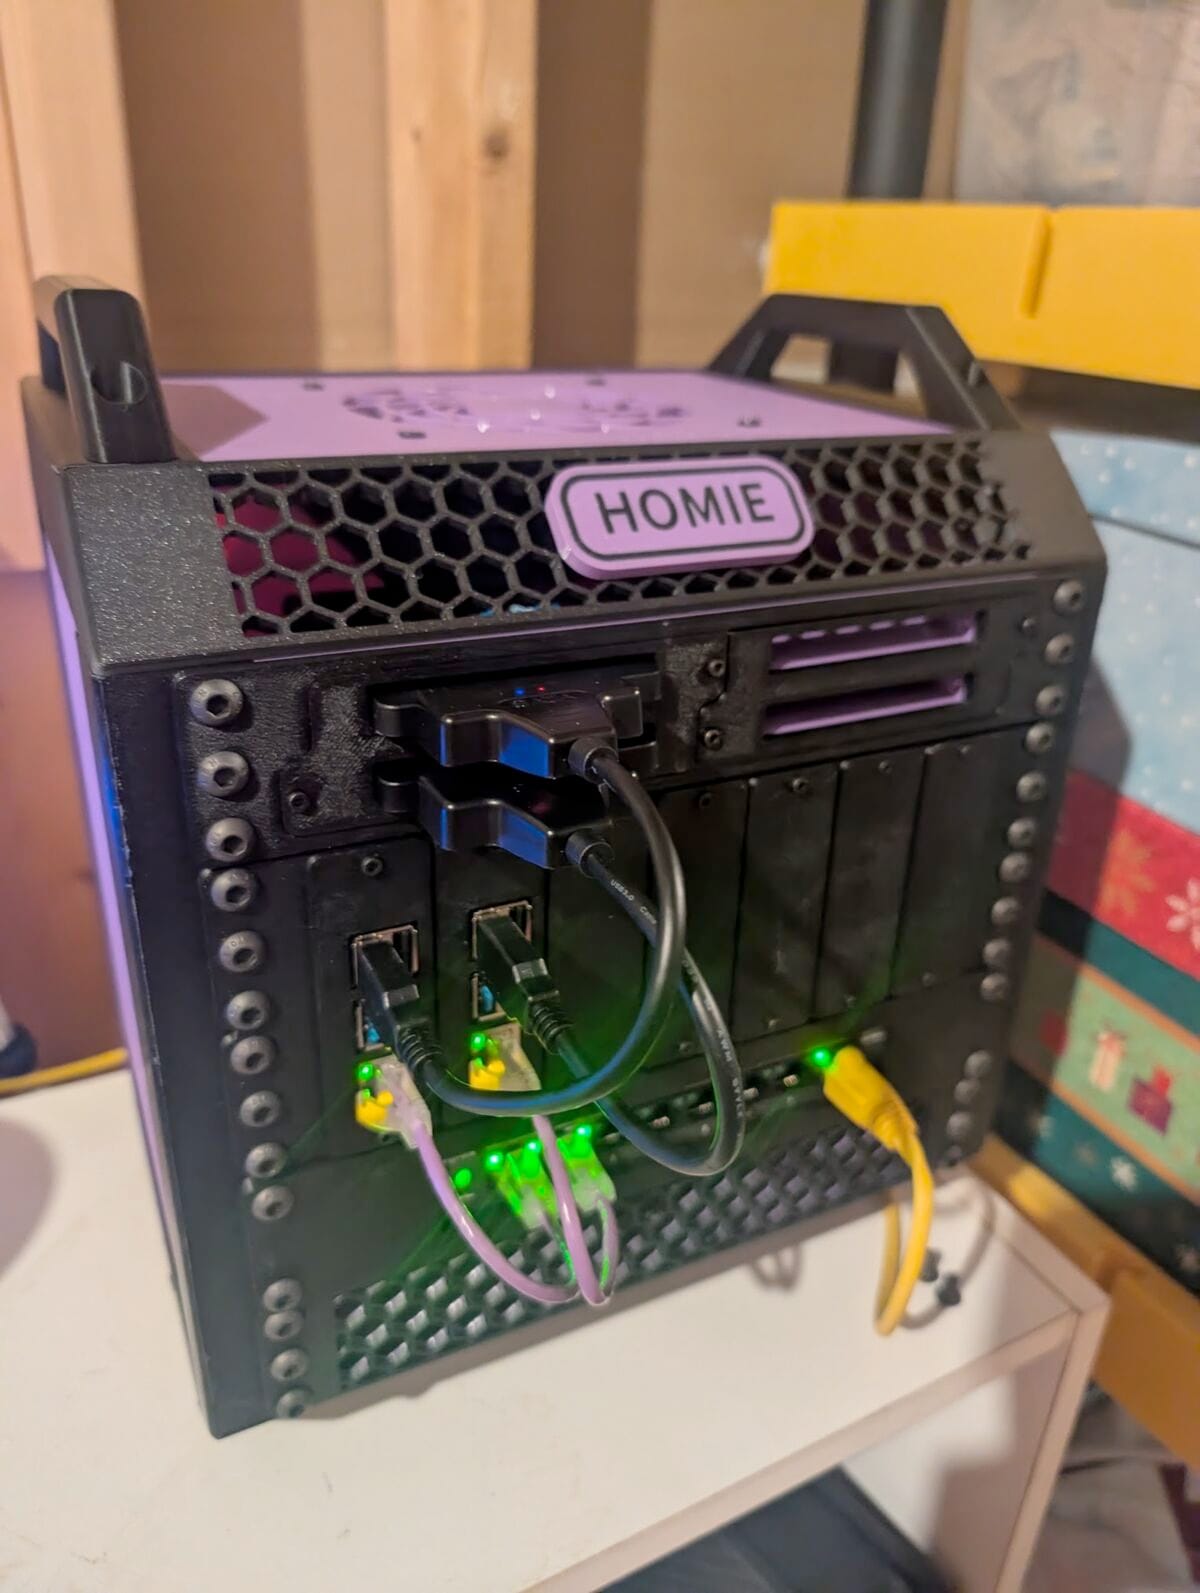
Before you know it I had a custom nameplate printed, and everything assembled
Network Isolation
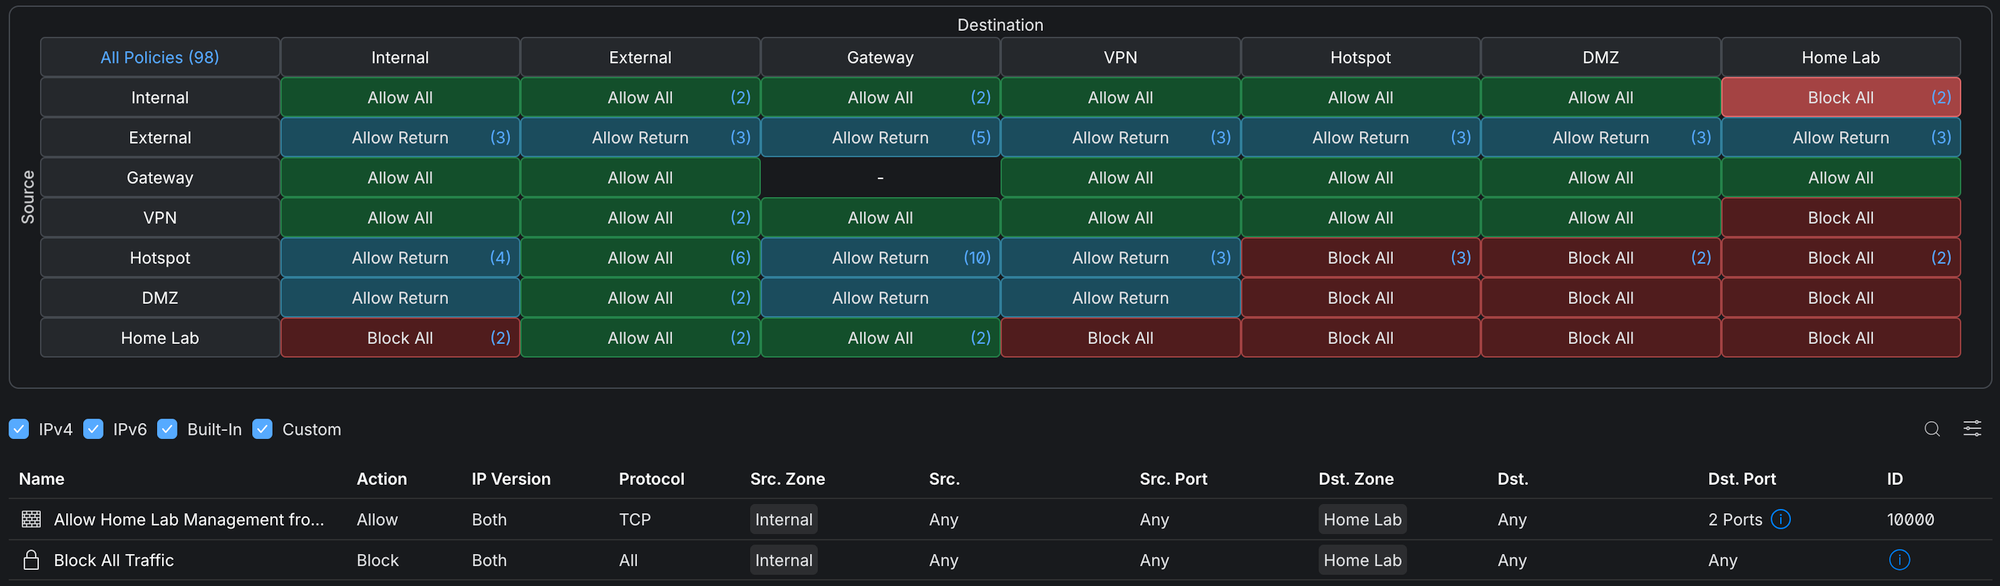
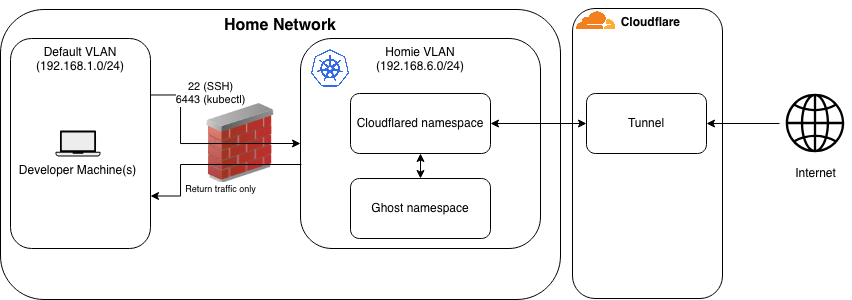
One of my big security requirements was that I want the home server isolated from my home network. This is where my Unifi equipment and specifically the Zone-based firewalls feature came in clutch (not a paid advertisement just absolutely love my Unifi network). To isolate the network I followed these steps:
- Create a new VLAN named Homie and assign a dedicated port on my network switch (Unifi Switch Flex) to that VLAN. Then wired that port into the network switch on the cluster and now anything I plug into any ethernet port on the server will be on the Homie VLAN.
- Create a new Zone, I called it Home Lab, and moved the Homie VLAN into it
- Create a policy to allowlist SSH and kubectl from the internal network
That setup in Unifi took all of 5 minutes including testing.

Cloudflare
I decided to leverage Cloudflare Tunnels to expose the website to the internet. What enticed me about this is that I didn't have to actually accept ingress on my server from the outside world. It also saved me any headaches about getting my ISP to assign me a static IP (let's be real it was probably just one phone call). Cloudflare also provides TLS, caching, bot filtering, and DDoS protection before anything ever reaches my cluster.
So I moved my bought-years-ago-and-never-used charliewillis.com domain over to Cloudflare to take advantage of all the out-of-the-box features it provides. And I never exposed a single asset to the internet, yet you are reading this blog on the internet and it's being served from my server.
There is one note worth mentioning with Cloudflare tunneling. Cloudflare tunnels terminate TLS at Cloudflare's edge to use security security features then reencrypting the traffic through the tunnel to my cluster. This means that Cloudflare can see plaintext traffic to and from my site. It's a tradeoff between protecting the sensitivity sensitivity in the data served from a leading cybersecurity company with a large following and glowing reviews to get a big handful of security features. For me, that is totally fine, it's a public facing blog. If I ever do something heavier on this machine that needs to protect PII or anything, I'll have to revisit this design.
Software
When it was time to choose an operating system I went with Ubuntu Server 24 LTS because it is awesome. An obviously battle tested Linux distro with apt package manager and a ton of documentation. I chose K3s as the Kubernetes distribution since it's so light and I want to reserve as much compute as I can for actual workloads rather than just orchestration. For blog technology I went with Ghost. Wordpress was considered, but I already have experience in it, and I saw an opportunity to play with something new. Plus Ghost has a smaller footprint than Wordpress which means more room for more fun projects later.
Results
- I now have a quiet, portable, and contained home server that has a control plane node and 1 worker node, with room for 5 more Pis to add to the fun later.
- I learned more about firewalls, VLANs, network isolation, and Cloudflare tunneling.
- I leveled up some 3d printing skills including the super satisfying installation of heat-set inserts.
By building this server I definitely laid a foundation of having a secure and simple way of exposing stuff to the internet from the comfort of my home. No cloud costs , free tier usage limits, botching something in a VPC, or botched IAM policy to worry about. I'm excited to continue to leverage it and get back into flexing some Kubernetes muscles.
I focused on building the server out in this blog, but I left out a really fun part. That was my use of AI to automate the provisioning and configuration of a server node, as well as the K8s manifests that stand up my namespaces, pods, PVCs, etc. I'll discuss all that in my next blog and focus on what I liked about AI, what I didn't, iterating/vibing, and additional steps I took to make sure that AI is increasing productivity but not keeping me in the dark about what is going on
Until next time